How to Set Up Gophish for Effective Phishing Simulations

What is Gophish?
Gophish is an open-source phishing toolkit, released under the MIT License , designed for businesses and penetration testers. It provides the ability to quickly and easily set up and execute phishing engagements and security awareness training. In this article, I will explain how to set up and manually run a phishing simulation. This article will also explain some pitfalls I experienced while setting up the simulation.
What is Phishing?
Phishing is a type of social engineering attack often used to steal user data, including login credentials and credit card numbers. It occurs when an attacker, masquerading as a trusted entity, dupes a victim into opening an email, instant message, or text message.
While there have been many attempts to mitigate phishing attacks, it is still the topmost way attackers get into networks and organizations, according to recent studies. There are even ways of bypassing MFA, one of the ways that makes phishing harder, which I will demonstrate in a later article.
There are several tools used to perform attacks but, in this article, I am going to demonstrate how to set up Gophish ,which is one of the best fishing frameworks used by security professionals.
I will describe all the technical steps taken in case you wish to do test your company’s defenses. I would emphasize here, please ensure you have the authority from the correct people in your organization before emulating anything I describe here. While I am happy to respond to any questions, do not blame me if you get fired 😊
Requirements
- Domain
- AWS EC2 Instance or Any VPS
- SMTP Server or Service
Domain Registration
There is no restriction on where to get a domain name. However, there are a few considerations you should make before purchasing one. I will highlight a few.
For the domain, the more similar to the original the better. We could use homoglyphs or permutations of the original domain. We can also consider fuzzy matches, that is using capital letters to imitate the normal ones. For example: example is equal to exampIe but the ‘i’ is in capital, etc.
Also keep in mind that we will need to wait to not make the domain suspicious for being newly created.
Here are some useful tools to work with:
If you do not want to use tools, you can use some websites:
As for the domain registrar, there is no preference really, so long as they allow you to edit DNS records, you will be good to go. I prefer using Namecheap of GoDaddy, but of course the preference is yours.
You could also consider getting an expired domain from expireddomains. This has the advantage of ensuring the domain has been online for some time and has a better reputation. This will help you minimize flagging newly registered domains as mentioned earlier.
VPS
This will be the server hosting your gophish framework. While it is possible to host gophish locally on your PC and do the magic of port forwarding, there are disadvantages to this. Phishing campaigns sometime take a long time to complete, or you might want to run them for as long as you can to maximize the impact. This would be limited to the case of personal PCs or laptops. Also, doing the port forwarding might end up exposing your public IP address or services that are running on your network. For this reason, I do not recommend that.
There are several choices for VSP (virtual private server). I have personally used AWS, Azure DigitalOcean , Linode and Vultr. All the providers work well if you are sure your SMPT traffic will not be blocked. (Will address this briefly). My preference here will be AWS, which I will be using in this blog but feel free to pick any that suits your need and that is affordable.
Set Up an AWS EC2 Instance
There are two options for setting up a gophish instance:
- Use the hardened gophish instance from the AWS marketplace, by HailBytes.
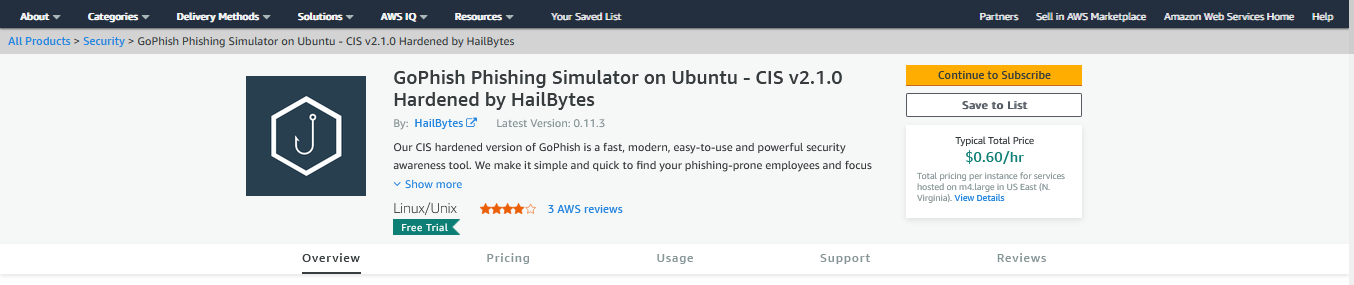
The disadvantage of using the marketplace is that it can get expensive quickly and the cost is not covered by credits if you have a promotion or sponsorship. Besides, the version is a little bit outdated.
2. The second option is to spin up a bare Ubuntu server and install gophish on it. We can also do the hardening by ourselves. Here are the steps of getting an Ubuntu server up and running:
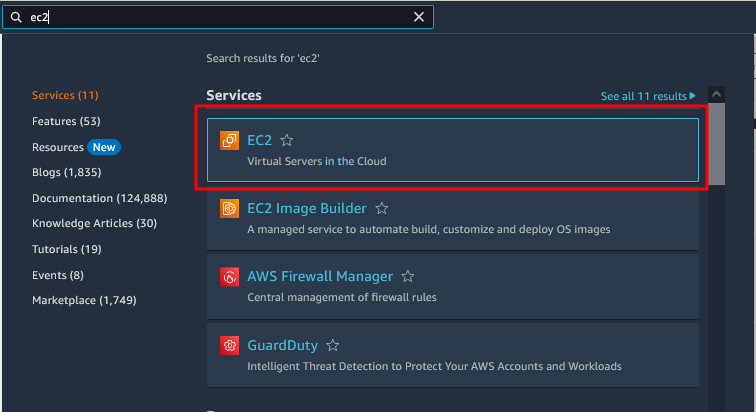
- Login into AWS Console.
- Search for EC2.
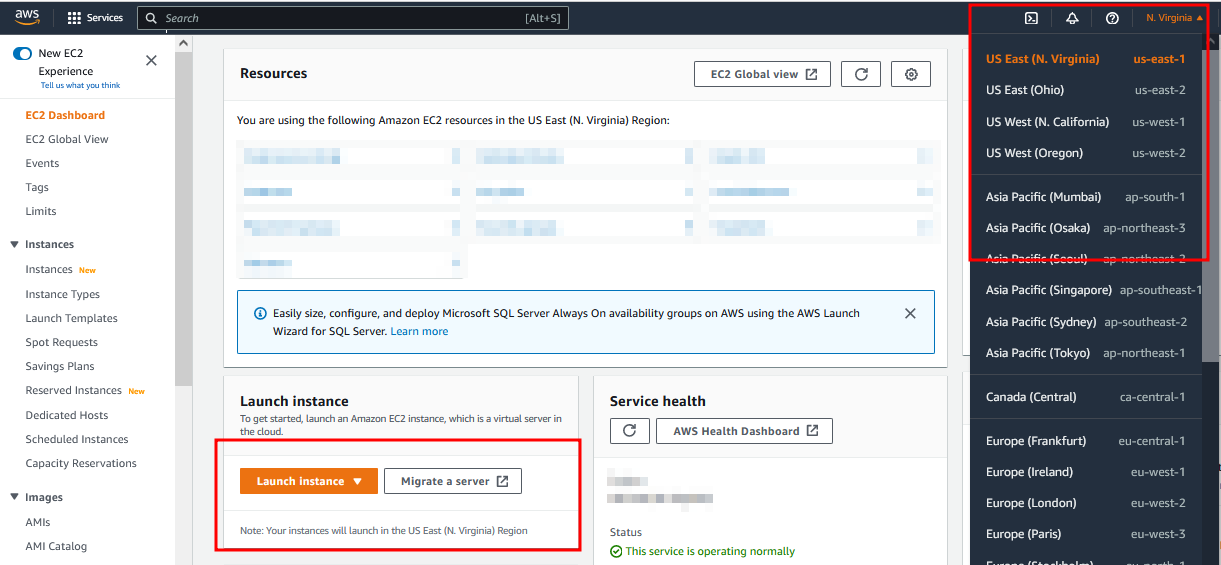
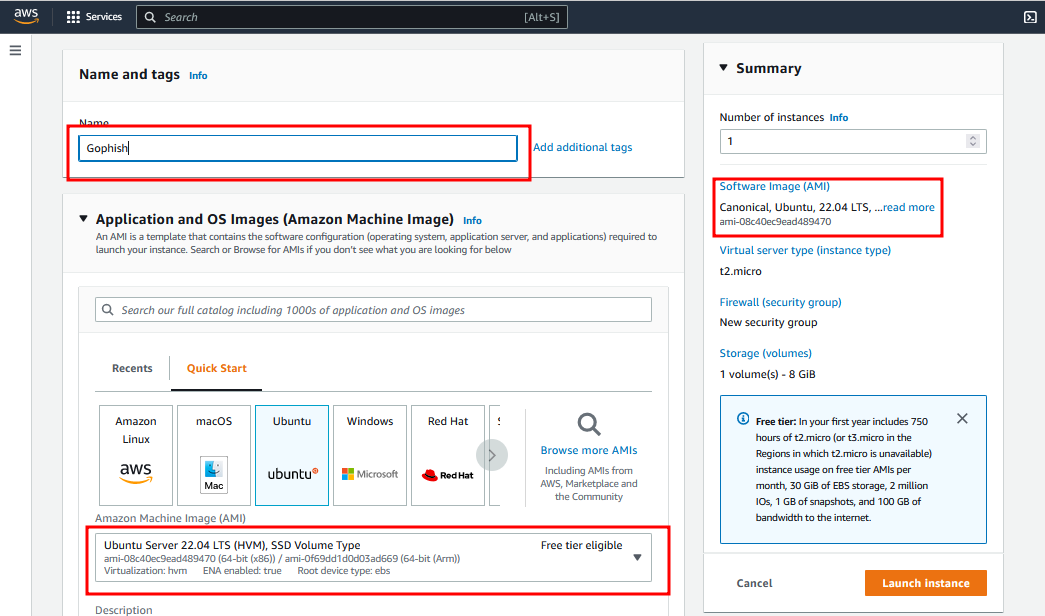
Click on Launch Instance. You may want to change the region to a different one if you wish as highlighted.
- Give your instance a name and Choose Ubuntu Server (Free tier eligible) and proceed further as shown below.
- Adjust the instance type (make sure your server has enough memory). You can use the t2micro or t3micro if you do not want to go beyond the free tire limits. However, giving your server more resources is recommended. Provide an SSH key. I recommend creating one for this purpose only and storing it safely. AWS will not store it for you and if misplaced you might be locked out. Also make sure it does not get into bad hands.
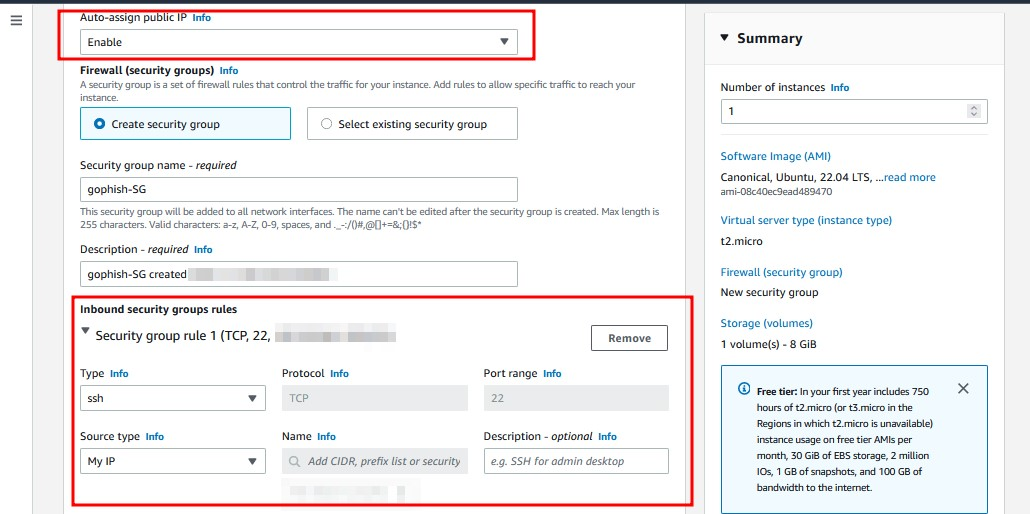
- Make sure you auto assign the public IP address because we will need this. To access the server and for our DNS settings.
- Give your security group a name and add the following rules: SSH from your IP and allow HTTP and HTTPS from anywhere. We will add another rule later.
- Add enough storage to your instance. Gophish requires at least 80GB. The free tire only allows you to have up to 30GB. So, you will be charged for the extra space. Gophish might not work if you limit the storage.
- Click on launch Instance.
SMPT Server
This is usually the thing that makes it harder to use gophish, or at least, that has been giving me problems whenever I was trying to set up a phishing campaign for the following reasons.
- Most VPS providers block SMTP traffic by default and so it becomes hard to set up your own SMTP server. However, there are a few cloud providers that allow SMTP traffic and the guide on how to set up your own server can be found here.
- Most email providers will not let you use their email services for such purposes, or they have made it a little harder and inconvenient.
- Even if you set up your own SMPT server, chances of your email getting delivered are minimal because the reputation of your server, if I may call it that way, will be low and your mails might end up in the spam/junk folders. The mail server space has been dominated by the big companies and the model has made it hard for one to have their own mail servers.
- Services offering SMPT services through APIs can be expensive at times, especially if you are sending a lot of emails or just starting out or practicing phishing.
So, what is my recommendation?
After trying out the several options available, my preference is using a cloud-based SMTP provider that allows you to send email without having to maintain email servers. This removes the hassle of setting up your own mail server or using multiple cloud providers in a single campaign. Also, the reputation of these services is high and so the chances of your mail landing into someone’s inbox are quite high.
While there are many services out there, I have tried the following and they work quite well.
Amazon SES by default has restrictions on all accounts and you will need to request the removal of this. The entire process was quite hectic for me, and I got frustrated along the way, so I opted for something else. I have tried both Sendgrid and Mailgun and they work well. I will be demonstrating using mailgun but feel free to use sendgrid. SendGrid interface was just a little bit confusing for me.
MailGun Domain Verification
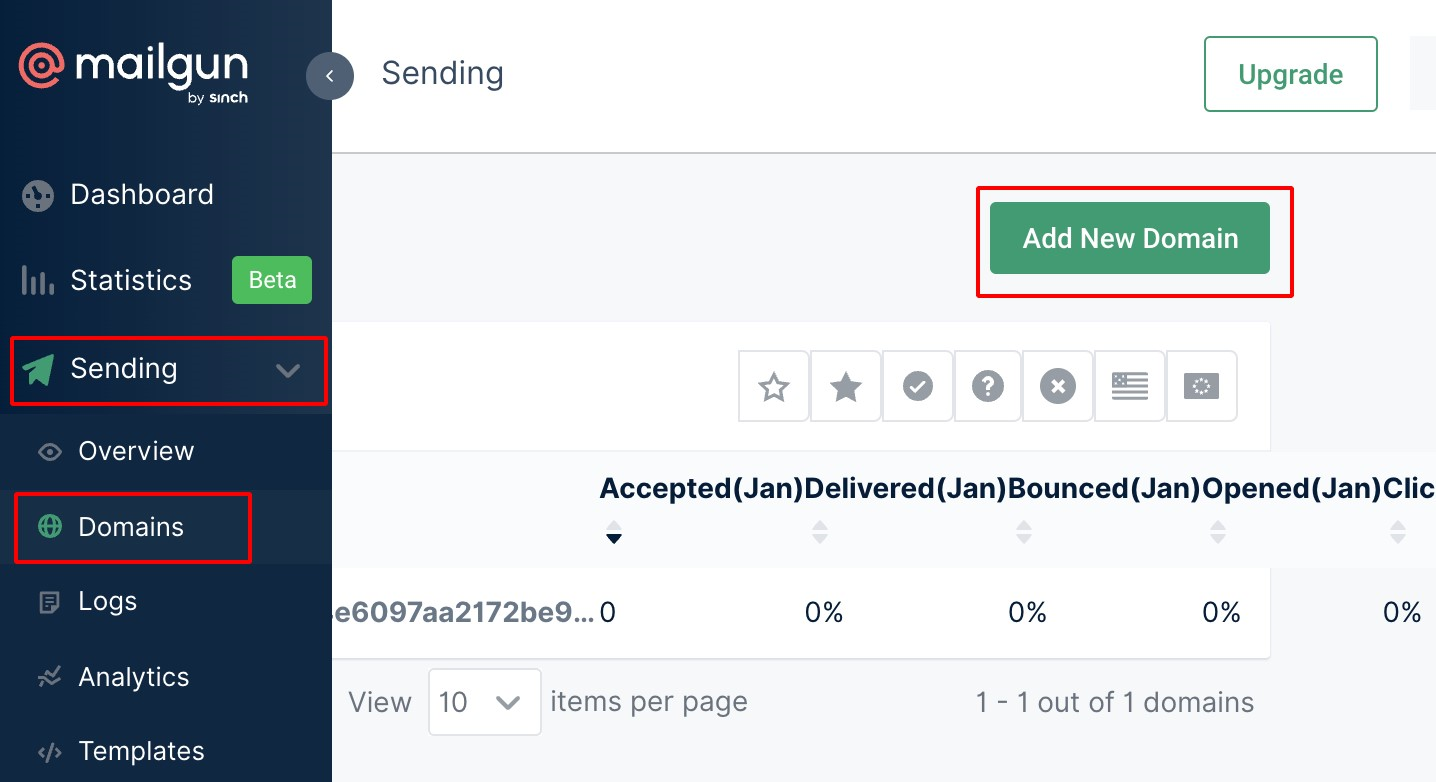
- Create a MailGun Account.
- Navigate to Sending —> Domains as shown below.
- Add the domain purchased from the previous step.
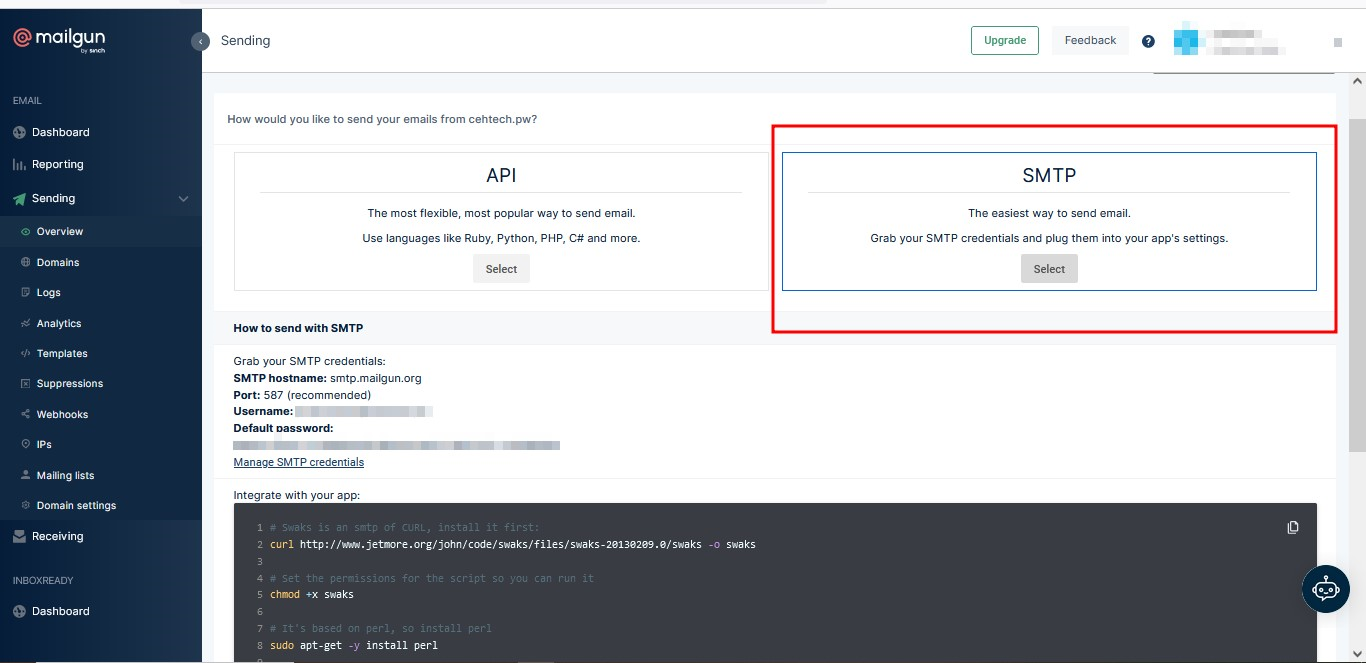
Mailgun needs to verify that we own the domain. So, we need to add the DNS records provided.
Once the domain is verified, select SMTP as the preferred way of sending emails for you to be able to obtain SMTP credentials.
It is important to note that MailGun will only allow you to add domains only if the credit card verification is successful.
Set Up Gophish
Now that we have our requirements ready, we can now set up gophish on our Ubuntu instance.
- Connect to the instance using ssh on your terminal or using third party apps like termius, mobaxterm or putty.
- Make sure to install golang
apt install golang
- Clone the GoPhish Github Repository using the following command
git clone [https://github.com/gophish/gophish.git](https://github.com/gophish/gophish.git)
- I recommend changing the management port from the default 3333 to something less common that will not be easily found.
- Add this port to the security group that was created earlier when setting up the server on EC2
- Edit the config.json change the 127.0.0.1:3333 —> 0.0.0.0:{Your chosen Port}
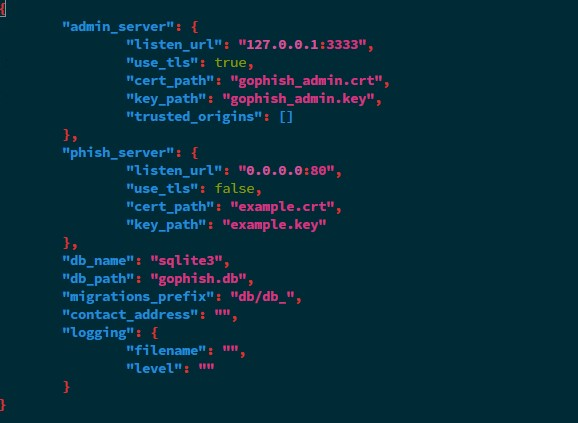
To
- Build and run gophish using the following command.
go build #building the binary
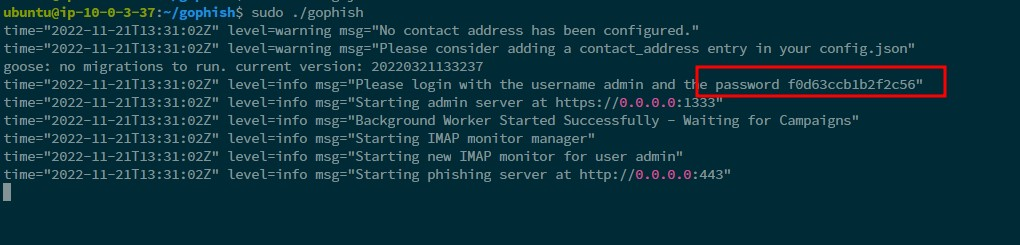
sudo ./gophish #run the binary
The default username is admin, and the password can be found from the logs after running the gophish binary. You will be asked to change this once you log in for the first time
- Navigate to https://ipaddress:3333 to access the GoPhish Dashboard (Make sure to add https://)
Set up SSL certificates and domain
Now that our instance is up and running, let us set up the domain and SSL certificate that we will be using.
- We first need to configure an A record on our domain provider to point to our EC2 instance IP address. My website is behind Cloudflare and so I will be doing the configuration on Cloudflare.

Notice we can access the admin portal on our port but still using an invalid SSL certificate. So, we need to configure the SSL certificate. We will use Certbot to make things easier.
To set up SSL, we follow the following steps:
- SSH into the server: SSH into the server running your HTTP website as a user with sudo privileges.
- Install snapd: Install snapd and make sure you follow any instructions to enable classic snap support. More details can be found on snapcraft’s site to install snapd. By default, snapd is already installed on ubuntu so we don’t need to do anything in our case.
- Ensure that your version of snapd is up to date:
sudo snap install core; sudo snap refresh core
- Remove certbot-auto and any Certbot OS packages: If you have any Certbot packages installed using an OS package manager like apt, dnf, or yum, you should remove them before installing the Certbot snap to ensure that when you run the command certbot the snap is used rather than the installation from your OS package manager.
sudo apt-get remove certbot
- Install Certbot
sudo snap install --classic certbot
- Prepare the Certbot command
Execute the following instruction on the command line on the machine to ensure that the certbot command can be run.
sudo ln -s /snap/bin/certbot /usr/bin/certbot
- Choose how you would like to run Certbot
If you are comfortable with stopping your webserver, then run this command to get a certificate.
sudo certbot certonly --standalone
If you have a webserver that is already using port 80 and do not want to stop it while Certbot runs, run this command, and follow the instructions in the terminal.
sudo certbot certonly --webroot
- Install your certificate
Copy the generated public and private keys to your gophish folder. Make sure to rename them to something you will remember.
cp /etc/letsencrypt/live/YOURDOMAIN/fullchain.pem gophish/domain_admin.crt
cp /etc/letsencrypt/live/YOURDOMAIN/privkey.pem gophish/domain_admin.key
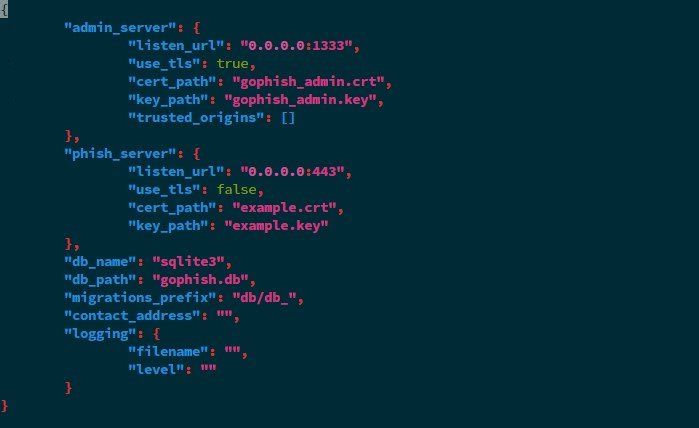
Re-edit your config file and replace the public and private keys with the ones generated as shown. You can use the certificate for both the admin dashboard and the domain itself.
Note: you will need to change the port from 80 to 443 as indicated.
- Test automatic renewal: You can test automatic renewal for your certificates by running this command:
sudo certbot renew --dry-run
- Restart gophish: for the changes to take place, stop the already running gophish session and start a new one.
To confirm that your site is set up properly, visit https://yourwebsite.com:PORT/ in your browser and look for the lock icon in the URL bar.
Conclusion
In this article, I covered the first step of setting up gophish to the point of making sure it is up and running. In the next article, I will demonstrate how to run your first campaign using this server. Thanks for reading and please do not forget to subscribe to the newsletter for more content like this