After successfully setting up a Gopish server on AWS and connecting that to our domain in our previous post, it is now time to create our first phishing campaign.
We first need to create the following
Sending Profile
This is the SMTP configuration to use when sending emails. We will use the one we have created above using Mailgun.
For the SMTP form, use an email address with your domain name to bypass SPF checks. You will edit what is displayed to the user in the envelope sender.
We will use `smtp.mailgun.or.:465`. Port 587, which is recommended, throws errors sometimes and hence the use of port 465.
The username and password will be the SMTP credentials we got when setting up a Mailgun account.
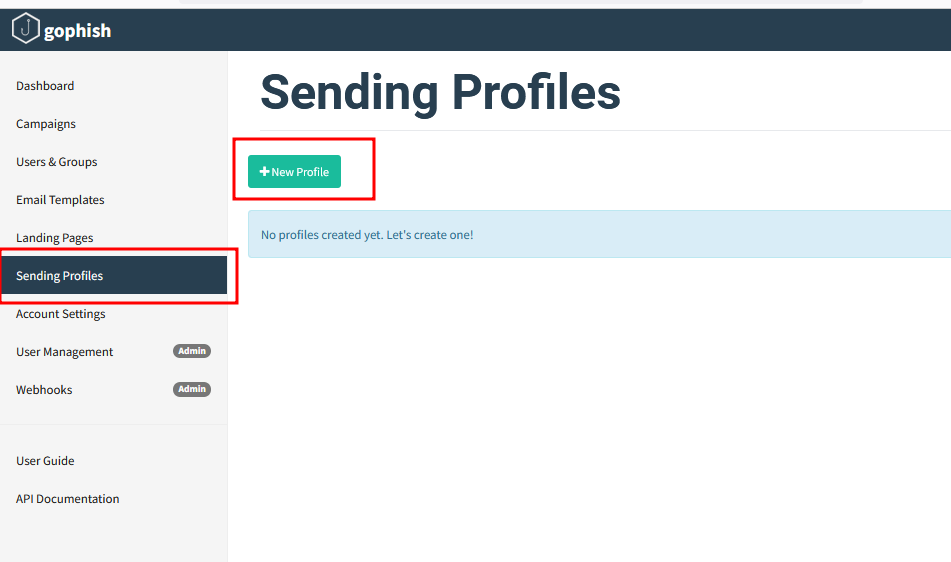
- Go to GoPhish Dashboard —> Sending Profiles, and click on new profile
- Give your sending profile a name that is easy to identify. Enter the SMTP username and Password and send a Test Email. Here is where we use the SMTP credentials we created in our previous post (Mailgun)
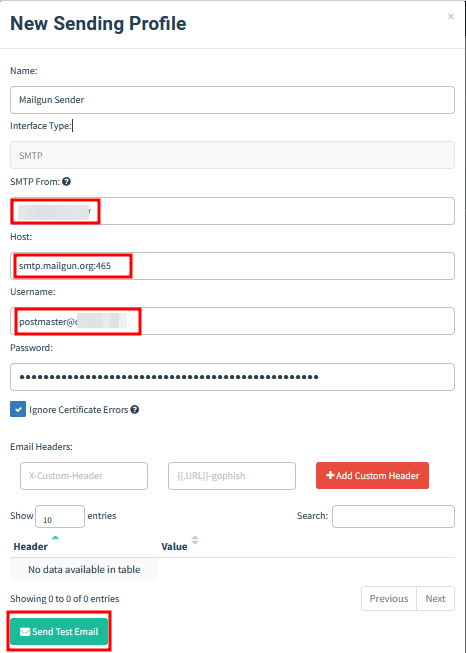
Click on send test email and make sure your credentials work.
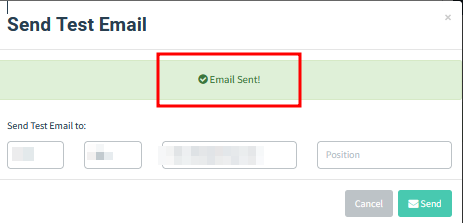
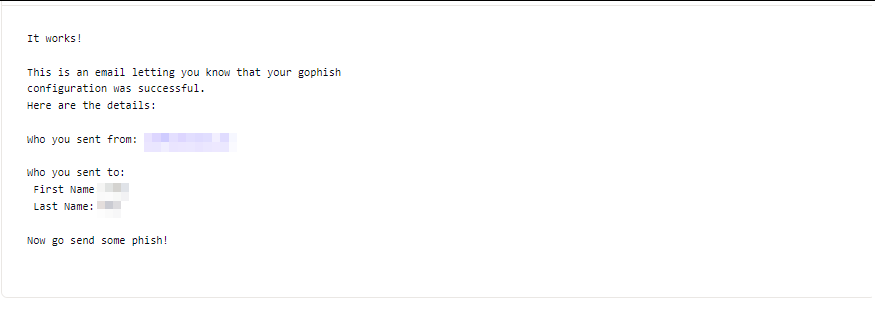
You should receive the email below in your inbox to confirm that everything works as expected.
Users and groups
GoPhish lets you manage groups of users targeted in campaigns.
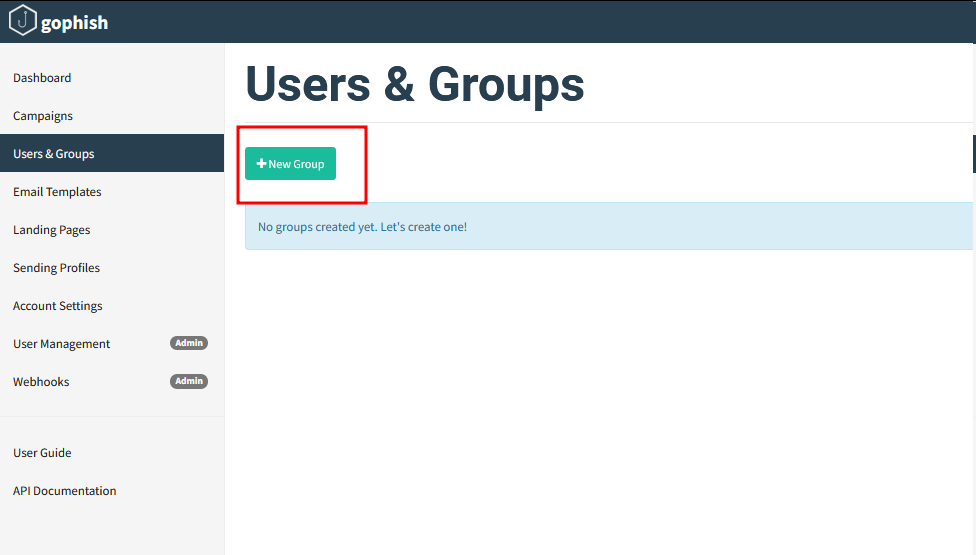
To create a group, first, navigate to the “Users & Groups” page in the navigation menu and click the button.
You can choose to add the users manually by Give the Group a name, enter the first and last name of the target user as well as the email address we verified earlier. Also, give the user a position.
Alternatively, you can use a CSV file to import users directly to GoPhish. Just download the sample CSV provided and fill it in with the users’ details.
To add a group, you need to specify a unique group name, as well as at least one recipient.
You can add the users to the group in two ways:
Manually: You fill in the text boxes for “First Name”, “Last Name”, “Email”, and “Position” and click the “Add” button.
Bulk Uploading Users:
We achieve this using a CSV file. The CSV format Gophish expects has the following header values:
- First Name
- Last Name
- Position
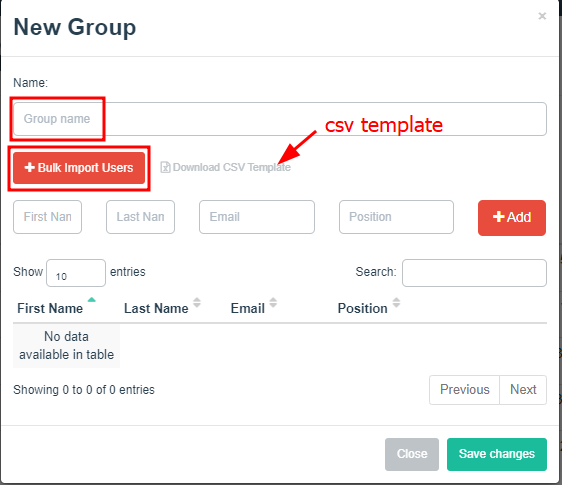
To upload a CSV with user information, click the “Bulk Import Users” button and select the CSV you want to upload. Users are then uploaded and displayed in the dialog.
Email Templates
You can craft your own email, but there are also some good templates available online that can be used. A sample can be found on this Github page.
You can also import one from one of the emails you have received from official companies. Simply download an email from whichever provider you are using as shown below. I will use Gmail web interface for this demo.
Gophish also supports sending attachments.
Additionally, templates can contain tracking images so that Gophish knows when the user opens the email.
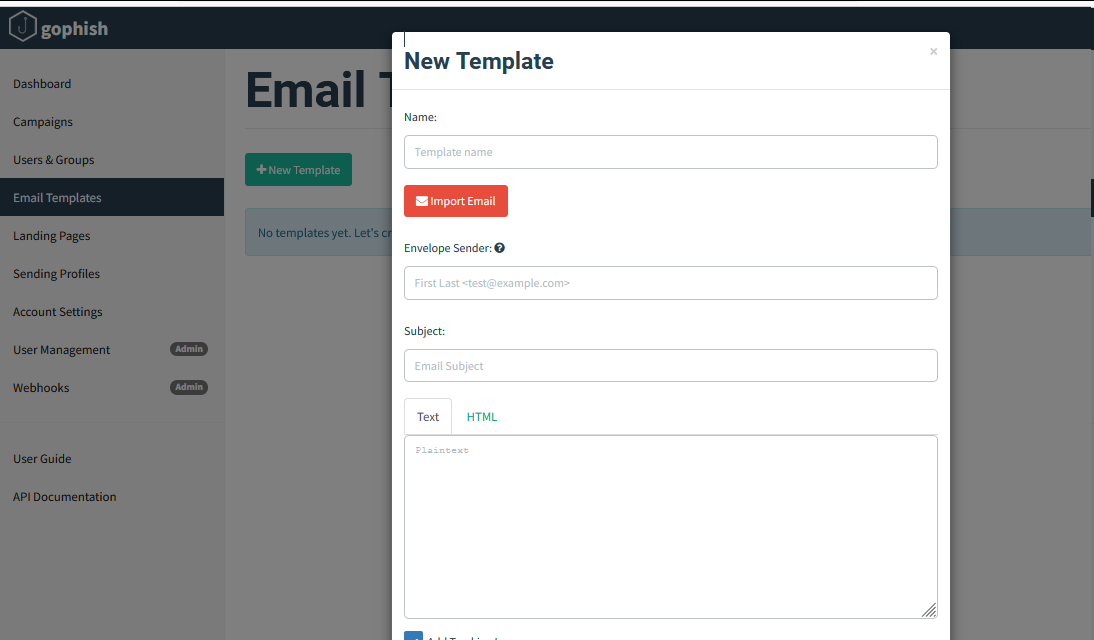
Not the envelope sender email. This is what will be displayed to the recipients in most mail clients.
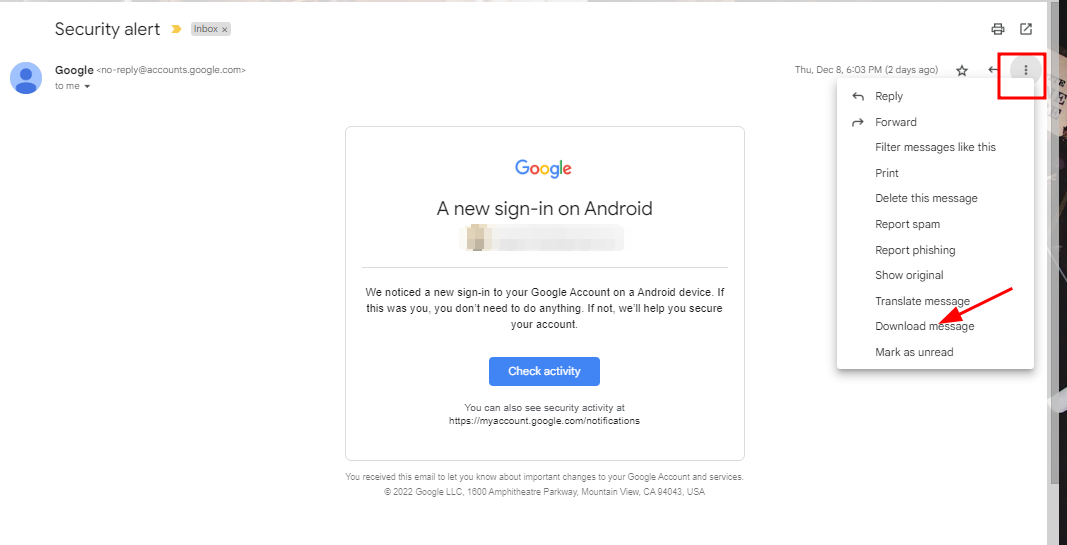
To import, simply click import on the email template that pops up and select the downloaded file. Edit it, remove any personal information, and customize it to suit your scenario.
Landing Pages
The HTML page is returned when a recipient clicks the link in the email template. This can range from simple log-in pages to complex pages. The goal is to emulate a real page as possible to convince the user to perform the desired action.
One tool I found useful is a Chrome extension, Singlefile, which copies the page as it is into one file that you can modify later. It is helpful because Gophish works well with single pages.
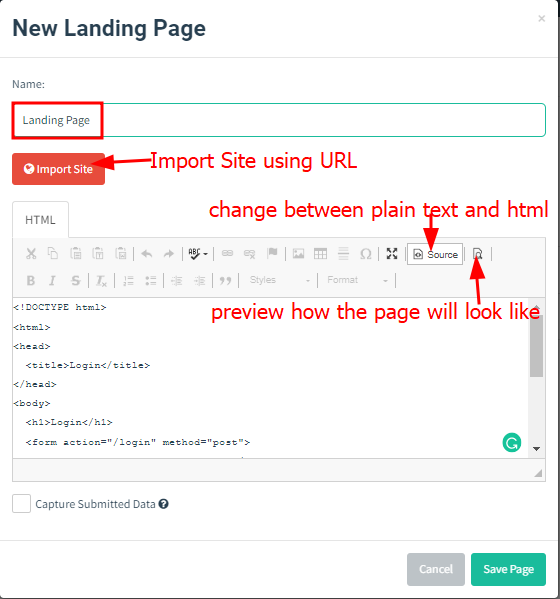
To create a landing page, go to Landing Pages in the Gophish console and click on the New Page button. Paste in the HTML content that you have created or imported from Singlefile extension. You also have the option of importing the page directly. This, however, does not work well most of the time because websites have implemented controls and protection against this. There is an option to preview how the page will look as shown below.
Create a Campaign
A campaign is where you can put it all together.
The focus of Gophish is on beginning campaigns. This entails sending emails to one or more groups and keeping track of whether the emails are opened, links are clicked, or login information is entered.
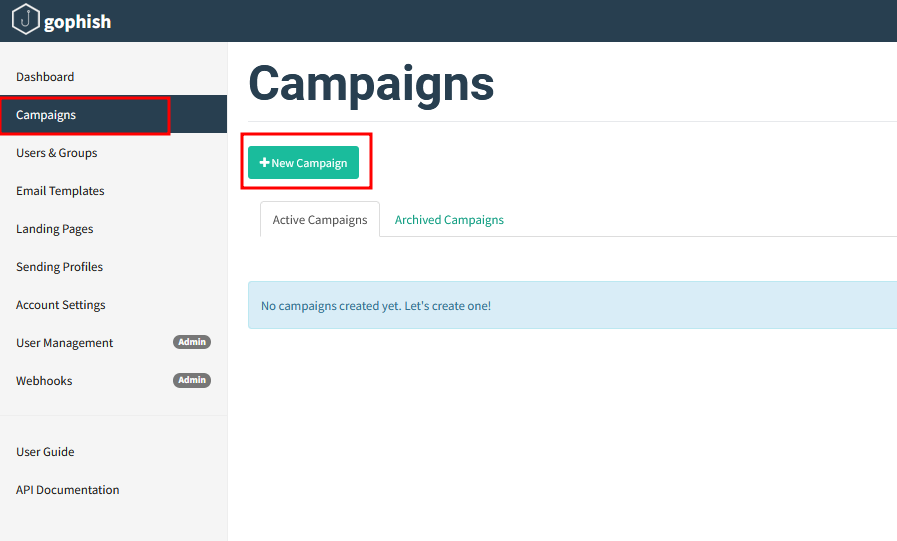
To configure and launch a campaign, click the “Campaigns” entry in the navigation sidebar.
To set up a campaign, you will need to have configured the following things first.
URL – This is the URL that populates the {{.URL}} template value, commonly used in email templates. This should be a URL or IP address that points to the Gophish phishing server and is reachable by the recipient. Use a domain or subdomain that points back to your VPS IP. The goal is to mimic the target domain as closely as possible
This should be configured using an SSL cert (like we did previously with Certbot) and the certificate and key put in the config file.
Launch Date – This is the date that the campaign will begin. See Scheduling Campaigns for more information.
Send Emails By – This is the date all emails will be sent by. See Scheduling Campaigns for more information.
To launch the campaign, give the campaign a name; select the email template from the drop-down; select the landing page you created from the drop-down; enter the IP address of the Gophish instance; select the sending profile you created from the drop-down; and finally, select the target group you created and then click on the Launch Campaign button:
We’ve launched our phishing campaign, and now all we have to do is sit back and wait for someone to click on the link in our phishing email!
If you enjoyed reading this article, please consider subscribing to the newsletter for more cybersecurity-related articles and get notified once new content is published.


