CrowdSec: Open-Source IPS With a Crowd-Sourced Brain
CrowdSec is a free, open-source intrusion prevention system that shares threat intelligence across every instance running globally. This guide covers installation, bouncers, configuration, and everything in between.
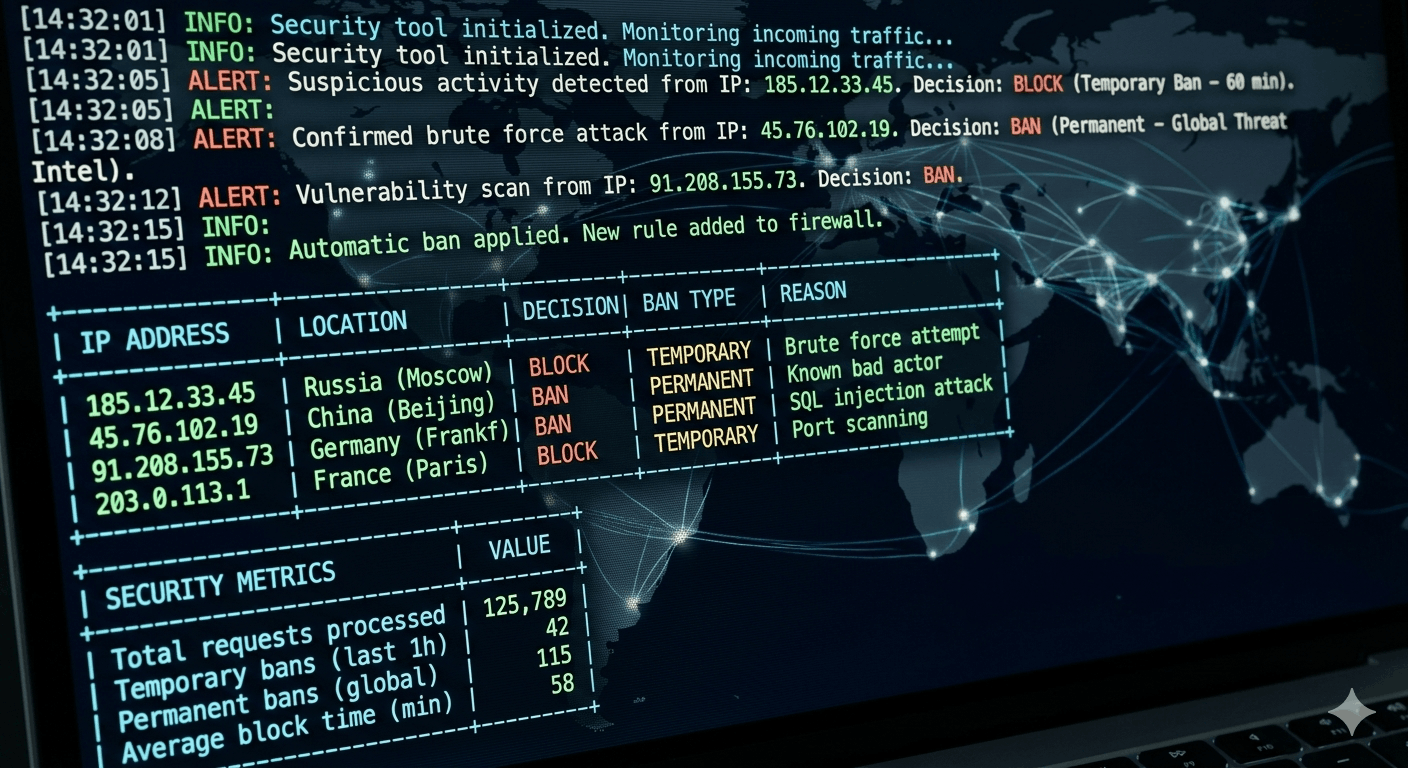
If you run a Linux server — a VPS, a self-hosted app, a home lab exposed to the internet — it's being scanned. Constantly. Automated bots crawl the entire IPv4 address space in hours looking for open SSH ports, outdated software, and exposed admin panels. If you've ever checked your auth.log you've seen it: hundreds of failed login attempts from IPs you've never heard of, all day, every day.
The traditional answer is Fail2ban. Watch the logs, ban IPs that fail authentication too many times, move on. It works. It's been working since 2004. But it only knows about attacks that have already landed on your server — every other instance of Fail2ban running globally is watching its own attacks in complete isolation, with none of that intelligence shared anywhere.
CrowdSec changes that model. It does everything Fail2ban does, but when it catches an attacker, it reports that IP to a central service. Every other CrowdSec instance in the world gets that IP added to their blocklist — often before that attacker ever reaches them. The same threat data sharing model antivirus vendors have used for decades, applied to network intrusion prevention, released under the MIT license and free to run.
How CrowdSec is structured
Before touching a command, it helps to understand what the pieces are. CrowdSec has a deliberate architecture that separates two jobs: detecting attacks and blocking them.
The Security Engine (the crowdsec daemon) is the detective. It reads your server logs, parses them, runs behavioral detection scenarios, and generates decisions — ban this IP, captcha that one. It exposes a Local API (LAPI) on 127.0.0.1:8080 so other components can query those decisions. The engine itself doesn't block anything.
Bouncers — also called remediation components in CrowdSec's current documentation, same thing, two names — are the security guards. They're separate processes that connect to the engine's API, ask "what should I block right now?", and enforce it — at the firewall level, at the nginx level, at Cloudflare's edge, wherever you install one. The apt packages and CLI commands still use "bouncer" (cscli bouncers, crowdsec-firewall-bouncer-nftables), so you'll see both terms depending on where you're reading. One engine, multiple enforcement layers simultaneously.
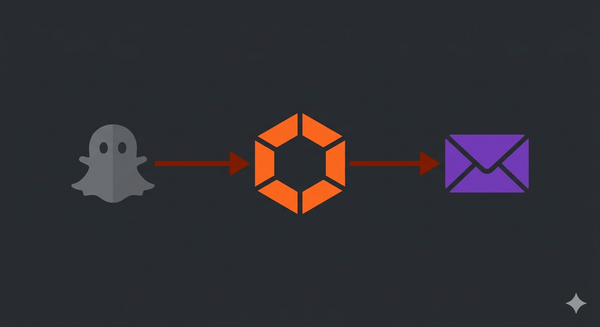
The Central API (CAPI) is CrowdSec's hosted cloud service. Your local engine sends attack signals up (IP + scenario + timestamp — no user data, no log content) and pulls the crowd-sourced community blocklist back down.
The Hub at app.crowdsec.net/hub is a library of community-maintained parsers and scenarios. A parser is a rule that teaches CrowdSec how to read a specific log format — nginx logs look different from SSH logs, which look different from Postfix logs. A scenario is a detection rule: "if the same IP fails SSH authentication 5 times in 20 seconds, that's a brute-force attack." Collections bundle parsers and scenarios together so you can install support for an entire service in one command.
The practical upshot: you install the engine once, then layer on whatever enforcement makes sense for your stack. Firewall-level blocking via iptables/nftables (the Linux kernel's built-in firewall), nginx-level blocking that serves a proper 403 page, Cloudflare edge enforcement — or all three at once.
Installation
Debian / Ubuntu
The fastest path is the official install script, which sets up the apt repository and installs the engine:
curl -s https://install.crowdsec.net | sudo sh
sudo apt update
sudo apt install crowdsec
If you'd rather not pipe a script directly to bash (a reasonable position — you can always inspect it first), the official Linux docs have the manual GPG key and sources.list setup.
After installation, a setup wizard runs automatically. It scans for services you have installed (nginx, Apache, sshd, etc.) and writes a log acquisition configuration based on what it finds. Don't assume it got everything right — verify what it detected once the install completes.
CentOS / RHEL / Fedora
curl -s https://packagecloud.io/install/repositories/crowdsec/crowdsec/script.rpm.sh | sudo bash
sudo yum install crowdsec
Docker
Minimum working Docker Compose configuration:
services:
  crowdsec:
    image: crowdsecurity/crowdsec
    restart: always
    ports:
      - "127.0.0.1:8080:8080"
    environment:
      COLLECTIONS: "crowdsecurity/nginx crowdsecurity/linux crowdsecurity/sshd"
      TZ: "UTC"
    volumes:
      - crowdsec-db:/var/lib/crowdsec/data/
      - crowdsec-config:/etc/crowdsec/
      - /var/log/nginx:/var/log/nginx:ro
      - /var/log/auth.log:/var/log/auth.log:ro

volumes:
  crowdsec-db:
  crowdsec-config:
One mandatory detail since v1.7.0: /var/lib/crowdsec/data/ must be in a named volume or the container refuses to start. Not optional. The example-docker-compose repo has production-ready templates with bouncers already integrated.
Verify the engine is running
sudo systemctl status crowdsec
sudo cscli version
sudo cscli capi status        # confirms connection to the Central API
sudo cscli machines list      # shows registered engine instances
sudo cscli collections list   # shows what's currently installed
cscli is CrowdSec's command-line management tool. You'll use it for everything — installing collections, managing bans, checking metrics, debugging why a log source isn't being parsed. If capi status fails, the engine still runs and still bans locally — it just won't receive or contribute community intelligence until connectivity is restored.
Step 1: Whitelist your own IP (do this before anything else)
This step is not optional and the timing matters. Once you add a bouncer, CrowdSec will start enforcing blocks at the firewall level. If your IP gets flagged before you whitelist it, you lock yourself out. Set this up first.
CrowdSec v1.7+ includes a cscli allowlists subcommand that handles this without editing YAML files or restarting the engine:
sudo cscli allowlist create trusted -d "Trusted IPs"
sudo cscli allowlist add trusted 203.0.113.10     # your public IP
sudo cscli allowlist add trusted 192.168.1.0/24   # your local network
Check what's whitelisted at any point: sudo cscli allowlist inspect trusted.
RFC1918 private IP ranges (10.x.x.x, 172.16.x.x–172.31.x.x, 192.168.x.x) are whitelisted by default — if your server is on a private network, that traffic is already covered. The concern is your real public IP.
Dynamic IP caveat: If your ISP assigns you a new IP periodically, you'll need a cron job to update the allowlist entry. There's no built-in solution for this yet — it's a known friction point for home users who expose services from a residential connection.
For more complex whitelisting — skipping detection on specific URL paths, whitelisting based on request headers — you create a YAML file in /etc/crowdsec/parsers/s02-enrich/. That's an advanced topic; the cscli allowlists approach covers the common cases without touching files.
Step 2: Install collections
Collections tell CrowdSec what your server is running and how to recognize attacks against it. Without the right collection installed, CrowdSec will read your nginx logs and understand nothing from them — it'll see bytes, not attacks.
sudo cscli hub update                                           # refresh the hub index
sudo cscli collections install crowdsecurity/linux             # base Linux/syslog parsing
sudo cscli collections install crowdsecurity/sshd              # SSH brute-force detection
sudo cscli collections install crowdsecurity/nginx             # nginx log parsing + HTTP attacks
sudo cscli collections install crowdsecurity/whitelist-good-actors  # whitelist Googlebot, etc.
sudo systemctl reload crowdsec
Always reload after installing. The engine doesn't pick up new parsers and scenarios until it does.
Browse everything available at app.crowdsec.net/hub. Collections exist for Apache, Traefik, WordPress, Postfix, Dovecot, PostgreSQL, and dozens more. Install only what matches your actual stack — unnecessary collections waste parsing cycles without adding protection.
Keeping them current:
sudo cscli hub update && sudo cscli hub upgrade && sudo systemctl reload crowdsec
Hub items get updated as new attack patterns emerge and log format parsers are improved. Worth running weekly or hooking into a cron job.
How scenarios work
A scenario is a behavioral detection rule. When CrowdSec parses a log line, it routes the extracted data into matching scenarios — and each scenario runs a count. The detection model is called a leaky bucket: picture a bucket that slowly drains on its own. Every relevant event (a failed SSH login, a 404 response, an HTTP scan probe) pours something in. Normal traffic generates occasional events that drain out before the bucket fills. A sustained attack fills the bucket faster than it drains — when it overflows, that's an alert.
Different scenarios have different bucket sizes and drain rates. The SSH brute-force scenario (crowdsecurity/ssh-bf) overflows after 5 failed logins within 20 seconds. An HTTP scanner probe scenario might allow 15 requests across a 5-minute window before triggering. CrowdSec also has slow brute-force detection — scenarios that look for patterns spread across hours, where any single minute looks innocent but the cumulative picture doesn't.
When a scenario overflows, it creates an alert. The alert flows into profiles.yaml, which converts it into a decision (ban for 4 hours by default). The decision gets stored in the LAPI and pulled by every connected bouncer. That's the full pipeline: log line → parser → scenario → alert → profile → decision → bouncer.
Scenarios come installed with collections. Installing crowdsecurity/sshd gives you the SSH brute-force scenario. Installing crowdsecurity/nginx gives you a set of HTTP attack scenarios. You can also install individual scenarios outside of a collection:
sudo cscli scenarios list                              # see what's installed
sudo cscli scenarios list --all                        # see everything available on the hub
sudo cscli scenarios inspect crowdsecurity/ssh-bf      # see thresholds, description, metrics
sudo cscli scenarios install crowdsecurity/http-crawl-non_statics   # install a single scenario
sudo systemctl reload crowdsec
Some scenarios worth knowing about:
crowdsecurity/ssh-bf— SSH brute-force (5 failures / 20s)crowdsecurity/ssh-slow-bf— slow SSH brute-force (spread over hours)crowdsecurity/http-probing— HTTP path probing / scanner behaviorcrowdsecurity/http-crawl-non_statics— aggressive crawling of non-static resourcescrowdsecurity/nginx-req-limit-exceeded— nginx rate limit triggerscrowdsecurity/http-bf-wordpress_bf— WordPress credential stuffing
cscli scenarios inspect <name> is useful after a week of running — it shows how many times each scenario has fired, how many overflows generated alerts, and how many buckets are currently active. If a scenario is firing constantly on legitimate traffic, you can remove it: sudo cscli scenarios remove <name> && sudo systemctl reload crowdsec.
Step 3: Configure log acquisition
Log acquisition is how CrowdSec knows where to read. The wizard handles the initial configuration, but it doesn't always get everything — verify what it wrote and add anything missing.
Configuration lives in /etc/crowdsec/acquis.yaml and individual files under /etc/crowdsec/acquis.d/. Check both:
cat /etc/crowdsec/acquis.yaml
ls /etc/crowdsec/acquis.d/
Example acquisition file for nginx:
# /etc/crowdsec/acquis.d/nginx.yaml
filenames:
  - /var/log/nginx/access.log
  - /var/log/nginx/error.log
labels:
  type: nginx
For SSH on systemd-based systems that don't write /var/log/auth.log (some Ubuntu and Debian minimal installs skip it), use journald instead:
source: journalctl
journalctl_filter:
  - "_TRANSPORT=journal"
  - "_COMM=sshd"
labels:
  type: syslog
The labels.type field is the critical one. It tells parsers which format to expect. Set it wrong and CrowdSec reads the log but parses nothing — silently, with no error. If you later see that a log source has zero parsed lines in the metrics, a wrong type label is the first thing to check.
One gotcha worth knowing upfront: Running the setup wizard a second time, or reinstalling packages, can duplicate entries in your acquisition config. When the same log file appears twice, scenarios fire much sooner than expected because the engine counts each line twice. After any reinstall or upgrade, grep for duplicates: grep -r "var/log" /etc/crowdsec/acquis*.
Step 4: Install bouncers
With the engine detecting and your log acquisition configured correctly, add the enforcement layer.
Bouncers are independent processes — they don't talk to each other, they only talk to the LAPI. You can run the firewall bouncer, the nginx bouncer, and the Cloudflare bouncer all at once, each pulling the same decisions and enforcing at their own layer simultaneously. Installing one doesn't prevent you from adding others later.
Each bouncer authenticates to the engine's LAPI with an API key:
sudo cscli bouncers add my-bouncer-name
# Outputs a token — copy it, you'll paste it into the bouncer's config
Firewall bouncer
The standard starting point for any server. Adds banned IPs directly to iptables or nftables (the Linux kernel's firewall) — blocked IPs can't make TCP connections at all, not just HTTP ones.
First, check which firewall backend your system uses:
lsmod | grep nf_tables # if output appears: use nftables variant
sudo apt install crowdsec-firewall-bouncer-nftables   # Ubuntu 22.04+, Debian 11+
# or
sudo apt install crowdsec-firewall-bouncer-iptables   # older systems
Config file at /etc/crowdsec/bouncers/crowdsec-firewall-bouncer.yaml. Paste the API key from cscli bouncers add, confirm mode matches your firewall backend (nftables or iptables), restart. The bouncer creates its own firewall rules automatically — you don't write iptables rules manually.
Nginx bouncer
Where the firewall bouncer blocks at the kernel level, the nginx bouncer intercepts at the request level. It checks each incoming request against the engine's decisions before nginx handles it. This means you can serve a proper 403 page or a CAPTCHA challenge to blocked IPs instead of just silently dropping their connections — more useful when you want to distinguish bots from humans.
Supports ban mode (return a 403) and captcha mode (serve a reCAPTCHA, hCaptcha, or Cloudflare Turnstile challenge).
sudo apt install crowdsec-nginx-bouncer
One practical caveat: the stock nginx package on Ubuntu 22.04 ships without Lua module support, which this bouncer requires. It installs without errors but silently does nothing. Ubuntu 24.04 and Debian 12 work cleanly out of the box. If you're on 22.04, the options are upgrading to 24.04 or switching to OpenResty (a pre-built nginx fork with Lua included). If you're running WordPress on nginx and want the nginx bouncer specifically, the setup is worth the effort — it blocks credential stuffing and comment spam at exactly the right layer.
Config at /etc/crowdsec/bouncers/crowdsec-nginx-bouncer.conf:
API_KEY=<token>
MODE=stream            # stream (poll periodically) or live (check every request in realtime)
BOUNCING_ON_TYPE=ban   # ban, captcha, or all
Cloudflare Workers bouncer
If your server sits behind Cloudflare, the Cloudflare Workers bouncer pushes decisions to Cloudflare's edge — blocked IPs get stopped before a request even reaches your server.
Note: The original cs-cloudflare-bouncer package is deprecated and no longer maintained. Use crowdsec-cloudflare-worker-bouncer instead.
sudo apt install crowdsec-cloudflare-worker-bouncer

# Auto-generate config (discovers your CF accounts and zones)
sudo crowdsec-cloudflare-worker-bouncer -g <CLOUDFLARE_TOKEN> \
  -o /etc/crowdsec/bouncers/crowdsec-cloudflare-worker-bouncer.yaml
After deploying: open the Cloudflare dashboard → Worker Routes for each domain → find the route the bouncer created → set it to Fail open. If you skip this, any Worker error drops all traffic with a 1027 error. That's the kind of thing you want to know before 2am, not during.
Blocklist mirror (for network appliances)
If you're also running a router or network appliance — pfSense, MikroTik, Fortinet — this bouncer exposes CrowdSec's active decisions as an HTTP endpoint that those appliances can pull from. Supported output formats: plain text, MikroTik, Juniper, F5.
sudo apt install crowdsec-blocklist-mirror
Config at /etc/crowdsec/bouncers/crowdsec-blocklist-mirror.yaml. Set the API key, the listen port, and your output format. Verify it's working: curl http://your-server:41412/security/blocklist.
Step 5: Enroll in the Console (optional)
The CrowdSec Console is a hosted web dashboard for monitoring enrolled instances. The engine runs fine without it — this is optional — but it's useful if you're managing more than one server.
To enroll, create a free account, grab the enrollment key from the dashboard, and run:
sudo cscli console enroll $ENROLLMENT_KEY
sudo systemctl restart crowdsec
# Then accept the enrollment in the web UI
What the free Community tier gives you: alert history (500/month, 2-month retention), bouncer and machine status at a glance, Hub browsing with install commands, and up to 3 third-party blocklist subscriptions.
One thing you may notice on a low-traffic server: "Lite" status on your blocklist. This means you're receiving around 3,000 community-sourced IPs rather than the ~15,000 an active contributing instance gets. It's not a bug or a misconfiguration — CrowdSec sizes your inbound blocklist based on your contribution volume. Low-traffic servers generate fewer attack signals, so they get a smaller blocklist in return. It still works. It's just a smaller feed.
Premium (roughly $29/engine/month) scales the alert storage significantly, removes the blocklist subscription cap, adds centralized decision management across multiple servers, and bumps the organization-specific threat forecast to 50,000 IPs. Useful at five or more servers; harder to justify for a single self-hosted instance.
Blocklists: two sources of decisions
Decisions in CrowdSec come from two different sources, and it's worth knowing the difference between them.
Local decisions are what your engine generates itself — a scenario fires on your logs, produces an alert, profiles.yaml converts that into a ban, and the decision is stored locally in the LAPI. These show up in cscli decisions list --origin cscli (if added manually) or --origin crowdsec (from local detection).
Community blocklist decisions come down from CAPI. Your engine pushes attack signals up, and CAPI returns a personalized blocklist of IPs that have been flagged across the global network of CrowdSec instances — attackers that other servers have already caught. These show up in cscli decisions list --origin CAPI. You don't configure anything to get this; it happens automatically once your engine is registered.
The size of that community blocklist depends on your contribution status. Low-traffic servers (Lite tier) receive around 3,000 IPs. Actively contributing instances that generate and share meaningful signal get the full community feed of roughly 15,000 tailored IPs. The distinction isn't about paying — it's about how much signal your engine contributes.
Third-party blocklists are the third category — opt-in lists you subscribe to via the Console. These are curated feeds for specific threat categories: Tor exit nodes, known botnets, active scanner IP ranges, compromised hosting infrastructure. The free tier allows up to 3 subscriptions. Subscribe via app.crowdsec.net → Blocklists → browse and subscribe. The engine pulls subscribed lists automatically once enrolled. Third-party blocklist decisions appear under --origin lists:
sudo cscli decisions list --origin lists    # show decisions from subscribed blocklists
sudo cscli decisions list --origin CAPI     # show community blocklist decisions
sudo cscli decisions list                   # show everything
CTI (Cyber Threat Intelligence) lookups let you query CrowdSec's IP reputation database for a specific address. Useful when an IP keeps hitting your server and you want context — what behaviors has it been observed doing, what protocols it targets, whether it's classified as a scanner, proxy, or VPN exit node:
sudo cscli cti ip 1.2.3.4
The free Community tier allows 30 CTI lookups per week. The same data is accessible in the Console if you prefer a visual breakdown. Premium raises it to 100/week.
Step 6: Tune decision profiles
By default, CrowdSec bans IPs for 4 hours when a scenario triggers. That lives in /etc/crowdsec/profiles.yaml. You probably don't need to change it immediately — run the defaults for a week, see what triggers, then adjust.
When you do want to tune:
# Ban SSH brute-forcers for 24h, everything else for 4h
name: aggressive_ssh_ban
filters:
  - Alert.Remediation == true && Alert.GetScope() == "Ip" && Alert.GetScenario() contains "bf"
decisions:
  - type: ban
    duration: 24h
on_success: break

name: default_ip_remediation
filters:
  - Alert.Remediation == true && Alert.GetScope() == "Ip"
decisions:
  - type: ban
    duration: 4h
on_success: break
Profiles evaluate top to bottom — first match wins. After editing, validate before restarting: sudo crowdsec -t && sudo systemctl restart crowdsec. A config error in profiles.yaml takes down the engine on restart, so the validation step isn't optional.
Key cscli commands
These are the ones you'll use regularly once everything is running.
Decisions — what's currently blocked:
sudo cscli decisions list                          # all active decisions
sudo cscli decisions list --origin CAPI            # only from the community blocklist
sudo cscli decisions list --origin cscli           # only manual bans

sudo cscli decisions add -i 1.2.3.4 -d 24h --reason "manual ban"
sudo cscli decisions delete -i 1.2.3.4            # unban an IP
Alerts — detection history:
sudo cscli alerts list
sudo cscli alerts list -s crowdsecurity/ssh-bf     # filter by scenario
sudo cscli alerts inspect <alert-id>               # full detail on a specific alert
Metrics — what's actually being parsed:
sudo cscli metrics show engine
This is the most diagnostic command you have. It shows lines read vs. lines parsed vs. lines unparsed for each log source. If you see high unparsed counts on a source you care about, something is wrong with the acquisition config — wrong type label is the most common cause, followed by the collection not being installed.
"Want a full audit of your server's current state? The hardening checklist covers all 29 baseline items with a live score."
Debugging a specific log line:
sudo cscli explain --log "Sep 19 18:33:22 host sshd[1234]: Failed password for root from 1.2.3.4 port 22 ssh2" --type syslog -v
This runs a single log line through every parser stage and shows exactly what each one produces or rejects. Indispensable when a log source shows zero parsed lines and you can't figure out why. Works on whole files too: sudo cscli explain --file /var/log/nginx/access.log --type nginx.
CrowdSec vs. Fail2ban — who should use which
Both tools solve the same core problem. Which one you should run depends on your setup.
Fail2ban uses regex to watch log files and executes a local action (ban via iptables, send an email) when a threshold is hit. It's been working reliably for 20 years, uses 10–50 MB of RAM, has no external dependencies, and requires minimal maintenance once configured. If your threat model is "stop SSH brute force on a low-traffic 512 MB VPS," Fail2ban is probably all you need. CrowdSec is additional overhead with diminishing returns at that scale.
CrowdSec is the better fit when you're running multiple services (nginx, sshd, postfix, etc.) and want one tool to cover all of them; when you want proactive blocking from community intelligence before attackers even reach you; when you're running Docker and want container-aware log parsing; or when you want WAF capability without running a separate product. For WAF-level protection that inspects HTTP request bodies rather than just blocking by IP, CrowdSec's AppSec component is worth comparing to dedicated alternatives like Open-appsec on nginx.
The honest resource picture: CrowdSec wants 2 GB of RAM to be comfortable. Workable at 1 GB, noticeably tight at 512 MB. It also has more moving parts — when something stops working, there are more places to look. And it has a degree of dependency on CrowdSec's hosted CAPI: the engine keeps functioning if CAPI goes down, but blocklist updates stop. If you need complete independence from any hosted service — air-gapped environments, strict data residency requirements — Fail2ban or a purely local solution is the right call.
For most self-hosted stacks on a VPS with 2–4 GB of RAM running nginx and SSH, CrowdSec is worth the setup. The layered approach — engine detecting at the log level, firewall bouncer blocking at the kernel, nginx bouncer enforcing at the request level — covers attack surface that any single tool misses. That's what defense in depth actually looks like in practice.
Common issues
Zero parsed lines in metrics for a log source: Wrong labels.type in acquisition config, or the collection for that service isn't installed. Run cscli explain on a real log line to see exactly where parsing fails.
Port conflict: The LAPI defaults to 127.0.0.1:8080. If something else is already on 8080 (a web app, a monitoring agent), change listen_uri in /etc/crowdsec/config.yaml and update every bouncer config file to match.
Docker container won't start: Mount /var/lib/crowdsec/data/ as a named volume. This became mandatory in v1.7.0 — no volume, no start, no error that makes the cause obvious.
Nginx bouncer installed but not blocking: Check that your nginx build includes Lua module support: nginx -V 2>&1 | grep lua. Stock Ubuntu 22.04 nginx doesn't have it. The bouncer installs without complaint regardless.
Cloudflare Worker errors blocking all traffic (HTTP 1027): In the Cloudflare dashboard, find the Worker Route the bouncer created and set it to Fail open. The bouncer doesn't set this automatically.
Banned yourself: sudo cscli decisions delete -i <your-ip>. Then add yourself to an allowlist before it happens again.
Duplicate log acquisition after wizard reruns: Grep for duplicate entries across acquis.yaml and acquis.d/. Duplicates cause scenarios to trigger much faster than expected.
Current version and staying up to date
CrowdSec is on v1.7.6 as of January 2026. Releases are frequent — GitHub releases is the canonical source for what changed and when.
Notable since v1.7.0: the built-in Metabase dashboard (cscli dashboard) is removed — use the web Console instead; Docker requires the mounted data volume; and cscli allowlists replaced YAML-file whitelisting for simple IP/CIDR entries.
Hub updates are separate from engine updates. Collections, parsers, and scenarios get maintained independently and improve as attack patterns evolve. Running cscli hub update && cscli hub upgrade weekly keeps your detection current without touching the engine package itself.
If you want a broader picture of what Google's AI products can see across your account after configuring server-level protections, that's worth reading separately — CrowdSec covers your server perimeter, not what cloud services do with your data on their end.